The most comprehensive, simple and useful way to Transfer Music from S2/S3/S4/Ace/Note to S6.
Part 1: Samsung News
Part 2: How to Transfer Music from S2/S3/S4/Ace/Note to S6
Part 3: More related articles
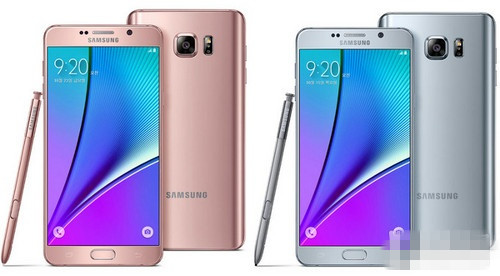
-------------------------------------- --------------------------------------------------------------------------------------------------------------------------Samsung NewsSamsung S6 edge Plus lens: the same specifications as S6
The reason may be the upcoming Samsung Galaxy S6 edge Plus the message is very dense. Now show news exposure, this big-screen flagship will use 16 million pixel camera.
The new message from the manifest listing the site Zauba Indias import and export. Which showed a 500 camera from domestic air transport to India, and these sensors are used in 16 million pixels, the size of 1 / 2.6. It is worth noti ng that these lenses are exactly the same specifications and Samsung S6 / S6 edge, it said to be the same one.
It seems Samsung is not intended to replace the Galaxy S6 edge Plus camera, but this 16 million pixel camera Samsung camera good results, you should not let the new machine plunges.
Configuration, the Samsung Galaxy S6 edge Plus still curved screen design, its larger screen, may reach 5.7 inches. Allegedly it will be equipped with Exynos 7422 processor, built-in 4GB of memory to run. Estimate the opportunity to appear in the new conference August 13, Samsung held.
----------------------------------------------------------------------------------------------------------------------------------------------------------------How to Transfer Music from S2/S3/S4/Ace/Note to S6Nowadays, music files are abundant after you download music, which makes it more difficult to transfer all the files between two phones. For most Android Samsung users, they may choose Bluetooth but finally they found it is slow. As a result, they ar e eager for an easy and quick way to transfer data between Samsung galaxy phones.
For those music lovers, they will be happy to share their songs with their like-minded friends. It may come up a problem: How to transfer lots of songs between Samsung galaxy S2/S3/S4/S5/Ace/Note to Samsung Galaxy S6/Edge/Plus phone? it seems not easy to transfer songs between two phones quickly. To make it easy, you can count on the third tool - Phone to Phone Transfer, which is your first choice for transferring data between iOS, Android and Symbian phones.
Phone to Phone Transfer-
Mobile Transfer is almighty tool for you to transfer music between Android Samsung phones. With its fast and handy function, you can transfer music in few minutes. Whats more, other data can be transferred under this wonderful program, like photos, contacts, call logs, text messages and apps. This Mobile Transfer tool is not just for transferring music between Android, you can also tran sfer data between iOS and Symbian phones in the similar steps.
Tips: If you want to recover lost data from your Android Samsung mobile phone, we can also recommend you the third-party Android Data Recovery software.
Now, please download the free trail version and have a try:
Use guide to transfer music from Samsung to Samsung galaxy S6/edge/plus:Step 1. Run the Mobile Transfer program
After downloading and installing Mobile Transfer program, run it on your computer. When you see the following window, click "Phone to Phone Transfer" to continue.
Step 2. Connect two phones to the computer
Now, connect both Samsung galaxy phones to the same computer via two USB cable. After connected well, the software will detect their models and automatically put them at the place of "Source" and "Destination". Make sure they are in the right places, if not, click "Flip" button to switch them.
In addition, if you want to clean all the data of Android phone, you can check the bos of "Clear data before copy" at the bottom of "Destination" phone.
Step 3. Transfer music between Samsung phones
All the content will be list and check in th e catalogue. Since you just want to transfer music, check the box of music and uncheck other data, then click "start copy" button. If you also want to transfer photos, music, etc. and you can check them as well. The transferring process will take you few minutes.
Note: If you want to transfer other data, you can check and transfer contacts, photos, text messages, etc. as well.
Phone Transfer is a almighty tool, which is compatible with all kinds of devices, like iPhone, Samsung Galaxy, Nokia, HTC, ect. Now, let’s download the trial version and have a try.

;

More related articlesHow to Transfer Apps from Samsung S2/S3/S4/S5 to S6/Edge/Plus?
How to Transfer Contacts from Sprint Epic to Samsung S6 Edge
How do i Copy my Pics from HTC to a Samsung S6?
Transfer Contacts from BlackBerry to BlackBerry Priv
Transfer Photos/Videos/Music from Windows Phone to iPhone


")


